Showing posts with label Cricut. Show all posts

Saturday, January 29, 2011

A Couple More Challenge Cards

Here are a couple more cards.  This first one is for The Shabby Tea Room - Winter Wonderland.  I used the this sketch, added some distressing to the edges of the papers and did some quick stitching.  For the snowflakes cut craft foam with a Cuttlebug die and then covered them with chunky glitter.  The image is from Magic Moonlight.

Shabby Tea Room - Winter Wonderland
Paper Sundaes #53 - Distressing
Sunday Sketch and Stamp - Sketch
Tuesday Throwdown - Distressing
Crafty Purple Frog - Distressing

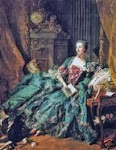
Stamps:  Verve Winter Wonder. Image from Magic Moonlight.
Paper:  MME Christmas Glitter, HOTP, Paper Studio
Ink:  Distress Inks
Accessories:  Cuttlebug, glitter, Spellbinders Labels Trio, sewing machine

A friend asked me to make a car for her boyfriend.  I used my Cricut to cut out the couple silhouette and the base.  I stamped the black heart with glue on Stampin Up French Flair background then sprinkled with glitter.  The red heart is attached on foam tape.  The base card is a 5.5" square easle card.  HOTP DP covers the card, which was inked around the edges and cut with deckle scissors.  Used an Inkadinkado stamp under the heart.  JustRite sentiment and border, cut out with Spellbinders.  Spellbinders Renaissance Hearts border, with some pearls on the bottom panel.

JustRite Friday Challenge - Love is in the air
Craft Your Days Away - Love

Stamps:  JustRite Romantic Sentiments and Just A Note border, Inkadinkado Garden Delight, Stampin Up French Flair
Paper:  The Paper Studio, HOTP.
Ink:  Colorbox Queues.
Accessories:  Cricut, glitter, foam tape, pearls, Spellbinders

Tuesday, February 16, 2010

Butterfly Box

I needed a quick little gift box for some little chocolates (Hershey's kisses, Andes Thin Mints, etc.), and I came across this gorgeous box on Tosh's blog, and I followed the link to Kristen's blog and her tutorial. Both theirs are just beautiful. This is what I came up with and was kind of rushed to get it finished. Maybe the next one will be better, because I loved making this and can see so many future possibilities!
Papers used are from Basic Grey, Hot Off the Press, and Cosmo Cricket. The butterfly was cut on my Cricut and I added Stickles to some of the borders. hard to tell, but the right wing is attached a little higher on foam tape. One big Prima flower, and the yellow and white ones are paper flowers that were in the clearance aisle at Michael's. They were in bouquets that looked like they had been run over by a truck, but I cut each blossom off and fluffed it up and they are really pretty. I attacked them with Stickles to give them some sparkle. I don't have any tiny drawer handles or pulls, so I used a charm from Hobby Lobby, attached with a brad for my drawer handles.
Stamps: None.
Paper: Basic Grey, Hot Off the Press, Cosmo Cricket.
Ink: Colorbox Queues.
Accessories: Charms, brads, Kaiser pearls, Michael's paper flowers, Prima flower, Stickles, Cricut, leaf punch, foam tape.

Monday, October 6, 2008

Second Post Today...Couple of Flowery Cards

Here are a couple more from my weekend of card playing. : ) This first one used no stamping. I ran a piece of white CS through the Cuttlebug Birds and Vines folder, inked the raised parts and mounted to olive CS. The second matted piece is simply a pretty sticker from Karen Foster that I put on white CS, put a rhinestone in the center, mounted on olive CS and attached that over the ribbon. The circle was cut from one of my Cuttlebug dies, then glittered it. Cut the butterfly from my Cricut, cut out the circle and attached it over the glittered circle base.

Stamps: None.
Paper: Paper Studio CS.
Ink: Colorbox Queues.
Accessories: Karen Foster sticker, Cuttlebug, Cricut, glitter, ribbon, rhinestone.

This second card I made for my sis-in-law with the first set of Kitchen Sink stamps that I got. I love hydrangeas. Did those in purples (have to work on those leaves), added the little butterfly. Cut the edges with deckle scissors, ticket punched the corners, inked around it. Mounted it to moss green CS that I ticket punched as well. The base is green CS onto which I mounted the yellow and white striped paper that was part of the packaging for another set of stamps (there's that recycle freak popping up again-heehee). The sentiment from SU! Blossoms Abound was stamped in lavender ink and embossed with clear powderUsed my corner rounder to scallop the lavender CS strip and attached it. Added the ribbon and some Dew Drops.

Stamps: Kitchen Sink, Stampin Up!
Paper: Paper Studio CS, recycled yellow/white packaging.
Ink: Colorbox Queues.
Accessories: Embossing powder, ribbon, Dew Drops, deckle scissors, corner rounder.

Friday, September 26, 2008

Time 2BKrafty!

Sharon's Stamp Simply Challenge this week showcases one of my favorite bloggers to stalk...Janine! This is the card I chose to case so that I could use my Cricut.
I embossed with the Cuttlebug spiderweb folder and then inked the raised parts. Tried to keep it only on the web, but you know...ink happens. :) Yellow layer under the black strip is a piece of tissue paper I wadded up tight then ironed back out. The pumpkins I cut with my Cricut, added Stickles to the leaves and "crazy eyes" and mounted on the black strip; the center pumpkin is popped up on dimensionals. Finally, added the tag from Spellbinders with the word printed from my computer, and some Dew Drops. My ribboning skills need work. :)
Stamps: None.
Paper: Paper Studio CS, tissue paper.
Ink: Colorbox, computer.
Accessories: Cuttlebug, Cricut, Stickles, Spellbinders, ribbon, Dew Drops, computer.