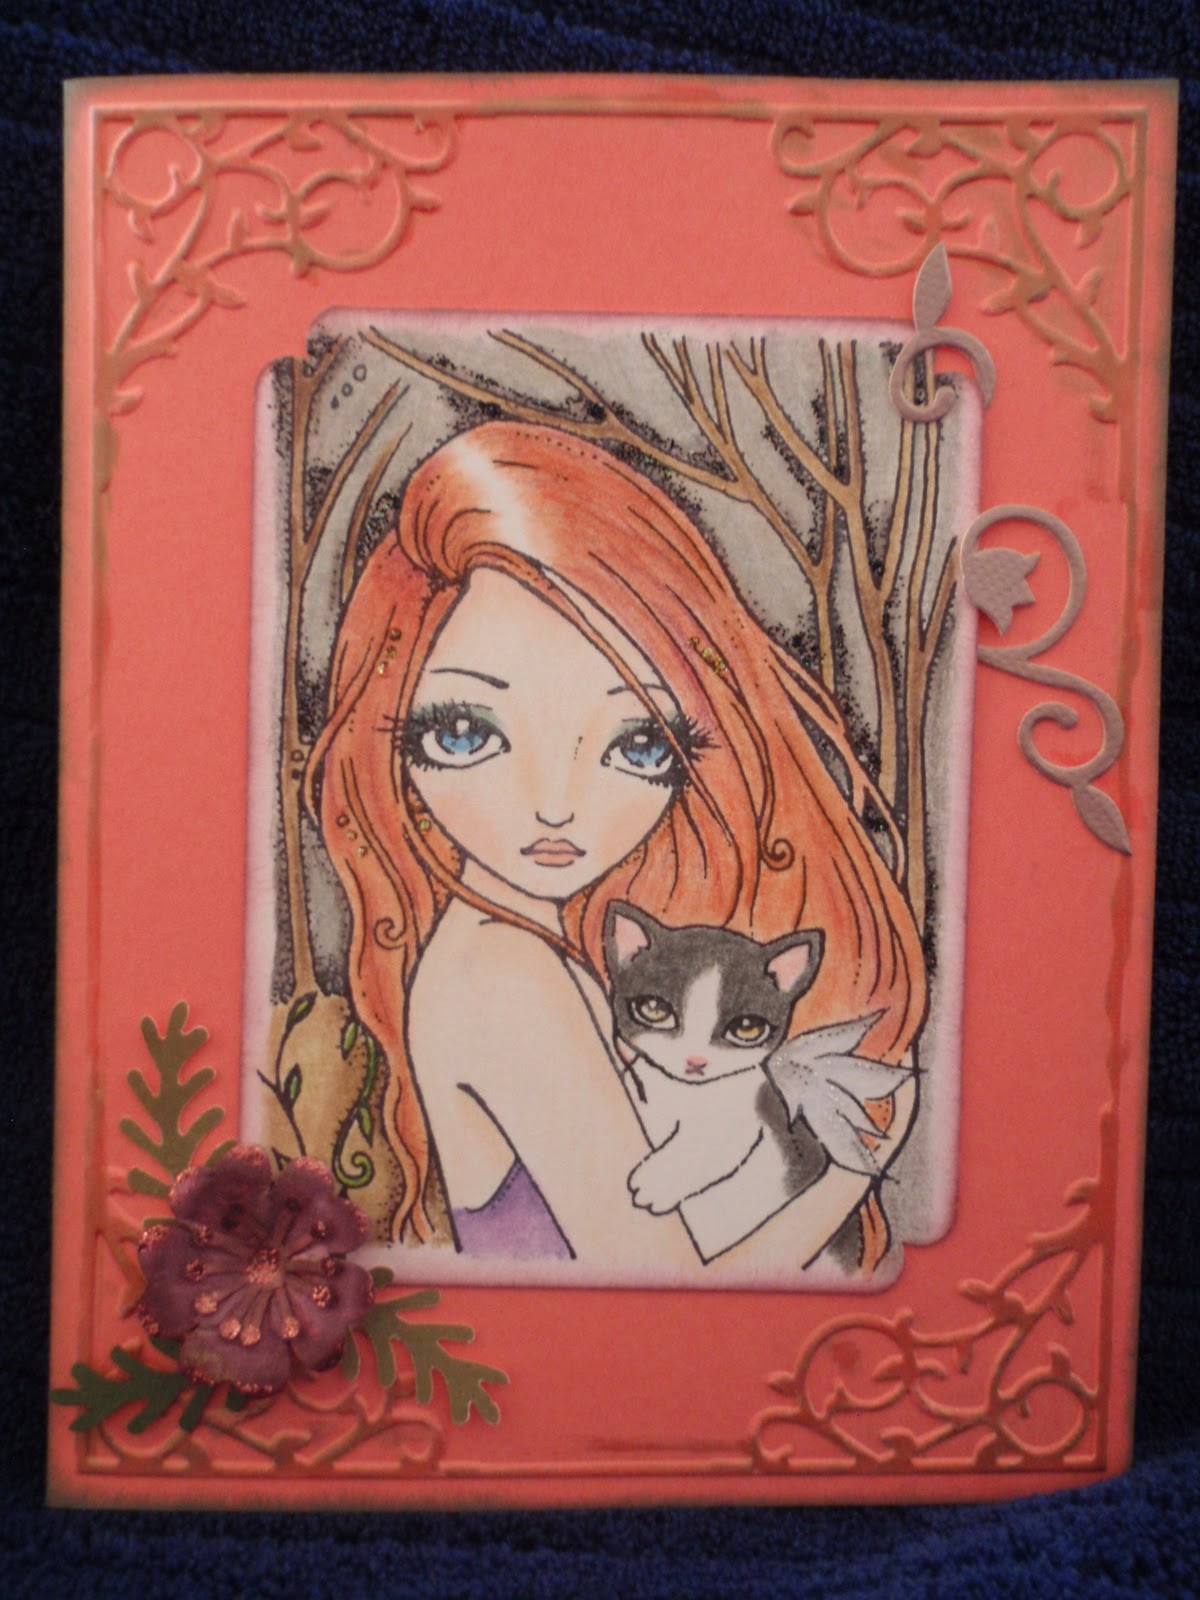
Stamps: Crafty Secrets Fairyland.
Paper: SU! Sage Shadow, Crafty Secrets Earthy paper pack.
Ink: Versamark, Distress Ink.
Accessories: Cuttlebug folder, embossing powder, Stickles.

 Dee jackson is hosting the Flourishes Timeless Tuesday challenge this week. She wants us to make a big card...5x7 or larger. This one is 5x7. I followed this week's sketch over on SCS used Flourishes "Santa, I Believe" set for the main image and the sentiment, cut/embossed with Spellbinders Labels Seventeen, inked in the die. The CS is from MME Christmas Glitter pack. I embossed the upper right portion of the base with Cuttlebug Allegro folder. Edges of all pieces were inked with Aged Mahogany Distress Ink. This also fills my personal challenge quota of a Christmas card a week. : )


 |
| Breakfast room (before) Girls night in. :) Can see where I'm in process of removing wallpaper, the vertical blinds and mini blinds we replaced. |
 |
| Living/Dining room. This was after we had been sanding for more than 12 hours |
 |
| Family room. Gray tile around fireplace I covered with venetian plaster, you'll see in after shot |
 |
| Breakfast area all put together. New French doors, valances I made, new window blinds |
 |
| Powder room with Venetian Plaster |
 |
| Family room. Venetian plaster over the gray tile around fireplace, valances up. |
 |
| Living/dining room, from the front door |
 |
| Military Ball invitations for the JROTC program at my son's high school. He is no longer in the program, but I have made the invitations for the last four years, they liked how I did them and they asked me to do them again. This is my fifth and last year. Their colors were purple and gold, theme was "Roman", so this is what I came up with. I made 125 of these. |
 |
| Beaded ornament covers. I did four different designs, five of each design in different colors. We had a Christmas party and I let the guests choose which ornament they wanted from the tree. They loved them! |
 |
| Fleece jackets. I made four of these, this is one for my daughter. The other designs were Dallas Cowboys, Texas A&M and Black Watch plaid. |
 |
| Mass Christmas Cards. My mother and some of my friends depleted my stash of Christmas cards. I never got around to making cards in time to send out to friends at Christmas but I did need a few for my family. Also, a friend wanted quite a few clean and simple cards, so I did a mass production of these, there were 40 in the varied designs and colors |
 |
| Christmas card I made for my mom. Not a mistake on lower part of card, I forgot to take a picture before I signed it, so I "airbrushed" the words off the picture |
 |
| Birthday card for my daughter, Shelbie |
 |
| Birthday card for my niece |
 |
| My daughter asked me to make a card for a friend of hers who got married New Years Eve. She loved this card I made previously and asked that I make similar one in her friend's colors. |


 I saw Sharon's challenge earlier in the week, to use pleated ribbon on our card. I am so ribbon challenged I just kept putting it off. I had everything worked out for the card, decided to use this week's Mojo Monday sketch for this card, but could not get the ribbon to look presentable. Then I remembered this ribbon I bought probably 15 years ago that I used on a dress for my daughter, and decided to use it. Thankfully the color was right so I didn't have to change what I had already started on the card.

 So here's my take on that. I decided to use this card for this week's Our Creative Corner
  We spent two nights and a day with Barb and Jerry before continuing on to Vermont. During our day there, we did the zip-line from the 230-foot tower at Shepherd of the Hills. It is about half-mile long, takes almost a minute to get to the bottom. It was wonderful! From left to right in the picture is Barb, me, a charming young man who got stuck with us three ladies, and Shelbie. Jerry took this picture from the top of the tower. Such fun! We spent the rest of the day wandering around Branson, with Barb and Jerry showing us different sights and attractions. I felt a wonderful kinship with Barb, and I hope we get to see her and Jerry again soon!
 This card followed the Mojo Monday 146 sketch. I used a Tim Holtz embossing folder for the base and the vellum oval, slathered them with distress ink. The strips are from a DCWV pack, inked those edges as well. Sentiment is from Inkadinkado, stamped with distress ink, cut out/embossed with Wavy Squares Spellbinders dies.

 Today is my son Tyler's 17th birthday. Where did the time go? He is such a wonderful young man, and I love every minute I have with him! Crazy that three weeks ago today I got a phone call all parents dread. Tyler was involved in a serious auto accident in which the van he was riding in was struck from behind while they were stopped at a red light. Four vehicles involved, with the van being sandwiched between the car in front of them and the one behind them, which was hit by a commercial delivery truck. There was a fatality in the first vehicle hit, Tyler suffered a head laceration and concussion, Tyler's stepmother was in ICU for four days with serious injuries, and one of his friends was also injured in the accident. Everyone is home now and on the road to recovery. I still slip into Tyler's room at night to check on him. Everything can change in a flash.
 I used the new Spring Bouquet stamp set from Flourishes, which I really like. Love this gorgeous bouquet. I stamped it with Stazon and colored with Primacolor Pencils blended with baby oil, then chalked around the image. Traced around the inside of the 2nd largest Labels 10 Nesties and cut out the image by hand so I could have the flowers extending beyond the margins, then cut a mat from the largest die. Stamped around the edge of the mat using Perfect Medium on a Crafty Secrets Flourish stamp, then applied Perfect Pearls. Gave it a pretty Ole-timey frame look, I think. : )
 d Stickles. A few flat-backed pearls on the front and...voila'. A pretty Mom's day card!
 We will head out Saturday after the graduation ceremony, so we can see one of her friends she went to high school with graduate from Norwich. We are going to do a week-long road trip coming back so we can do some sight seeing along the way. I have some friends in York, PA and Apex, North Carolina, so plan to make stops there to visit with them while we're on our way back. We both are really looking forward to the trip!

 und her while still in the die, then inked the edges. Mounted that to brown CS cut on the fold with the largest Labels 8, and attached a smaller label to the inside to write on. All DP is Basic Grey LilyKate. Flowers cut and embossed w
 ith Nellie Snellen punches, sprayed with Glimmer Mist, and added some Dew Drops. Attached a little pocket inside to put the card in. Will also be including a one-hour maternity massage for Audrey.

 acker board from a pad of decorative paper. This gave the box good stability, and also added perfect weight to give a good "flop" effect when the lid is taken off. I made and attached the stand for the card, then stamped and embossed the corners of a square piece of CS with a CS Flourish. Cut the square on the diagonal and attached it over the card holder. All the flowers and leaves were made from various punches, painted with Twinkling H2O's or sprayed with Glimmer Mist, and attached in various places with Stickles. One was attached to each panel. Four others were attached to acetate strips, with the other end being threaded through the flourished panels before it was attached. When the box opens, the panels flop down and the flowers on the acetate strips spring outward and sway. Again see Elaine's blog for more of those.
Okay, here's the "Jose moment": About five years ago I was in the grocery store checkout line with my daughter and six of her friends, getting supplies for a party at our house. All of these kids were in ROTC together, and all called me Mommy (still do). As I was about to pay for our goodies, one of the boys, Paul, was trying to get my attention and started bobbing up and down and saying "Mommy, Mommy, Mommy" over and over. The others quickly followed suit, and soon there were seven teenagers bobbing up and down and repeating "Mommy....". Not loud or disturbing anyone. The cashier looked at them - and me - with a strange expression. I told them to shush and they all piped down right away. Jose happened to be standing right next to me. He flashed his brilliant smile at the cashier, and in his very thick Chilean accent said "we all have different daddies". Ay yay yay. I just shook my head, and then we all started giggling. Still not sure to this day that the cashier didn't think they were all mine, all from different daddies. : )
 This is the other post that was supposed to go up over the weekend. Let's see if I got that scheduled post thing right this time. : )
 at the Austin Rodeo. Before it started we were wandering around the vendor booths, bought some silly hats (and I will wear mine when we go tubing this summer!) and some pretty rings. We came to one booth that had some beautiful plaques done in sort of shabby chic. Shelbie looked at one she liked, but when she saw the price she was shocked. So was I! The lady was selling these plaques for $40-60. I told Shelbie I would make her one, and this is what I came up with. It was fun to play with different stuff. I think she'll like it. The picture on the left is a bit washed out from the flash, but you see the overall shot. The smaller one below is more true to color.
 glued on various sized paper roses, punched some leaves and added veins with an embossing tool. Added Stickles to the tiny rosebuds before attaching those, then added the butterfly brad after I attacked it with copper Stickles on the wings. The sentiment I printed from my computer, onto plain copy paper that I "aged" by dunking into some water to which I had added a couple drops of Tea Dye Reinker. I tore the edges while it was still wet and then inked them. After it was dry I sprayed it with two different colors of Glimmer Mist. You can see the sheen if you click on the image. I glued on the Spellbinders Doodleparts flourish, added some flat-backed pearls. Used three dif
 ferent ribbons in different colors, one organza and two satins for the hanger, and threaded faceted beads onto the thinnest ribbon. I attached an eye-ring to the bottom center of the plaque and to that attached the filagree medallion. Another eye-ring, some tiny beads and more faceted beads, then an angel charm at the end, and that dangles from the bottom. Sorry so dark. I'm using a different camera and haven't made friends with it yet.


 Oriental Theme card